Copy VHS Tapes to DVD - Digital Camcorder
A simple to way to copy VHS tapes to DVD is with a digital camcorder. The miniDV camcorder for recording digital video became the replacement for the VHS camcorder, the Hi8 camcorder, and other similar analog camcorders.
SEARCH FOR VHS TO DIGITAL CONVERTERS
Nowadays, HD camcorders are available as well and these can also digitize or convert VHS to DVD or another digital format. This page will focus on the use of a miniDV camcorder as the digitization device, but the conversion procedure is similar for other camcorders.
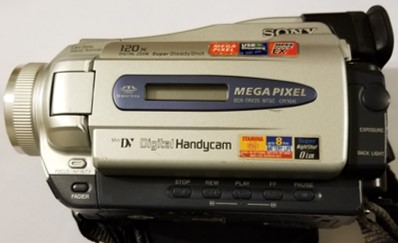
A miniDV camcorder is a digital video recording device and therefore it has built in digitization electronics and usable as a way to copy VHS tapes to DVD. The image below provides an example of a miniDV camcorder. The process for converting VHS to digital video is simple.

Step 1 – VHS to DVD Converter
Prepare the VHS tape by fast forwarding it to the end and then rewinding it in the VCR. The purpose of this step is to adjust the tension in the VHS tape wind, since the tape may have been sitting on a shelf for a long period of time and is not at the correct tension for proper playback. This process also conditions the tape to the VCR. Use the best quality VCR on hand for this task.
Step 2 – Connect VCR to Camcorder
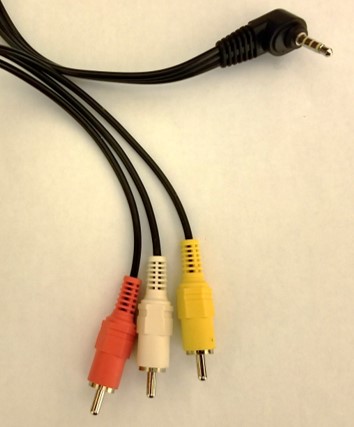
The next step is to connect the VCR to the miniDV VHS to DVD converter. To do this, a cable is necessary. The cable required has a single plug on one side and the red, white, and yellow (composite) plugs on the other end. The image is an example of a suitable cable of this type.

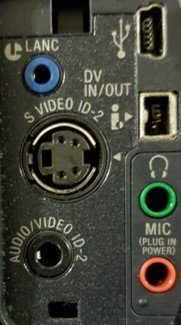
The single plug attaches to the miniDV camcorder in the Audio/Video slot. Plug in the red and white plugs for audio and the yellow plug for video in the corresponding audio/video out plugs on the VCR. There are other usable cables and connection options as well because the camcorder does provide many options (see the image below), but most basic VCRs only have the composite outputs.

Step 3 – Connect Converter to Computer
Connect the VHS to DVD converter or in other words, the miniDV camcorder in this case, to the computer. This is achievable via a USB cable or a Firewire cable.
Step 4 – Examination of VHS Recording
Before you copy VHS tapes to DVD or other digital format, establish how much video content is on the VHS tape. This will help to decide what is deserving to convert and how long it will take to do the conversion. Play some of the tape and using the image in the camcorder viewfinder, ensure the tracking is well-adjusted. If not, adjust the tracking on the VCR. The VCR can also be connected to the TV and the tracking adjustments made while viewing the video on the TV. The settings on the camcorder might require adjustment to view the content in the camcorder. Check the documentation for the camcorder in use.
Step 5 – Copy VHS Tapes to DVD or Other Digital Format
Rewind the VHS tape to the beginning and press play on the VCR. At this point the video can be recorded on a miniDV tape and then the tape replayed and the digital video fed into the computer after the VHS tape reaches the end. Alternatively, simply use the camcorder as a pass through and record or digitize the video directly into the computer. Examine the camcorder documentation to determine how to do this latter option correctly. The setting is usually a DV Out option. It must be set to ON.
Step 6 – The Created Digital File
A variety of different file formats are available to save the video on the computer, depending on the software available on the computer for dealing with the video. Windows Movie Maker is an example of such software. The most common format used is the AVI format. Once the digital video is in the computer as an AVI file or other file format, the copy VHS tapes to DVD process can be completed by creating a DVD or the video simply stored on the computer as an AVI file or converted to other digital video file formats.