- Home
- USB Flash Drives
- Check Flash Analyzer
Check Flash Analyzer
Check Flash is free software for examining the health of flash storage media.
Flash storage media such as USB flash drives, microSDHC, SDHC, and Compact Flash cards, are small and compact. Except for the connector portion of the media, all the components that make these media function are buried within a case. Now if storing data on flash media for the long term, meaning placing them on a shelf for many years, it is important to perform regular inspections, to ensure the media are not degrading.
Unfortunately, unlike older storage media such as photographic prints and negatives, paper documents, or books, where problematic deterioration is easily visible, flash media are different. If examining flash storage in a collection, looking at a USB flash drive or SDHC card will usually give little information on whether the media have begun to deteriorate or not. This is where software such as Check Flash becomes valuable. It allows a user to examine the inside of flash media with analysis using a computer.
The Check Flash Software
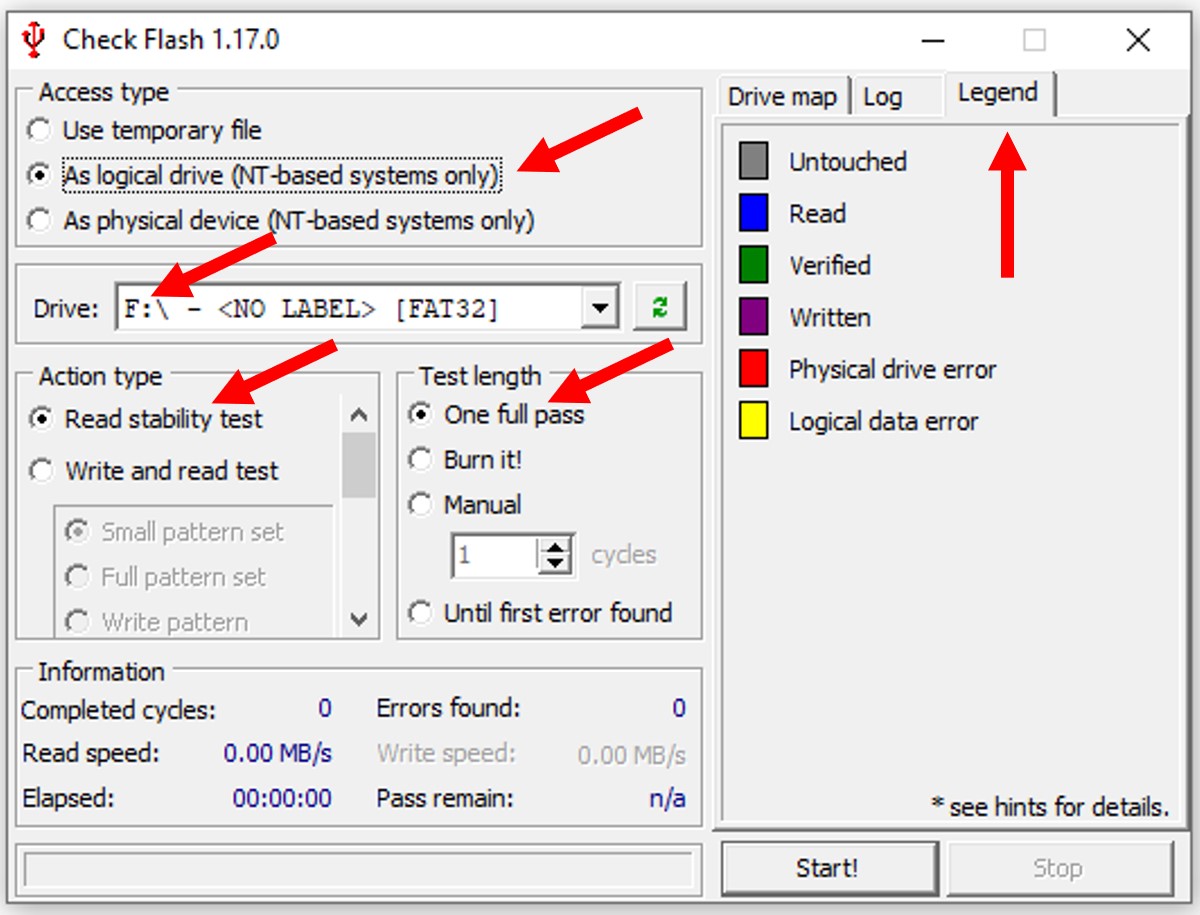
Check Flash is easy to download and install on a computer. Once installed and the software opened, a screen pops up as illustrated in the picture below.

The first area to consider is the “Access type”. In this section, select the “As logical drive (NT-based systems only)” option. Below this is a row labeled “Drive”. Click on the drop-down arrow and select the flash storage device for testing. In this example, testing will be on a USB flash drive and labeled as G drive by the computer operating system. Next comes the box to select the required test function. The desired test is the “Read stability test”. Do not select the “Write and read test” because this will erase the stored data. In the “Test length” box, select “One full pass”. The Check Flash program is now ready to begin analyzing the USB flash drive.
Running a Flash Media Analysis
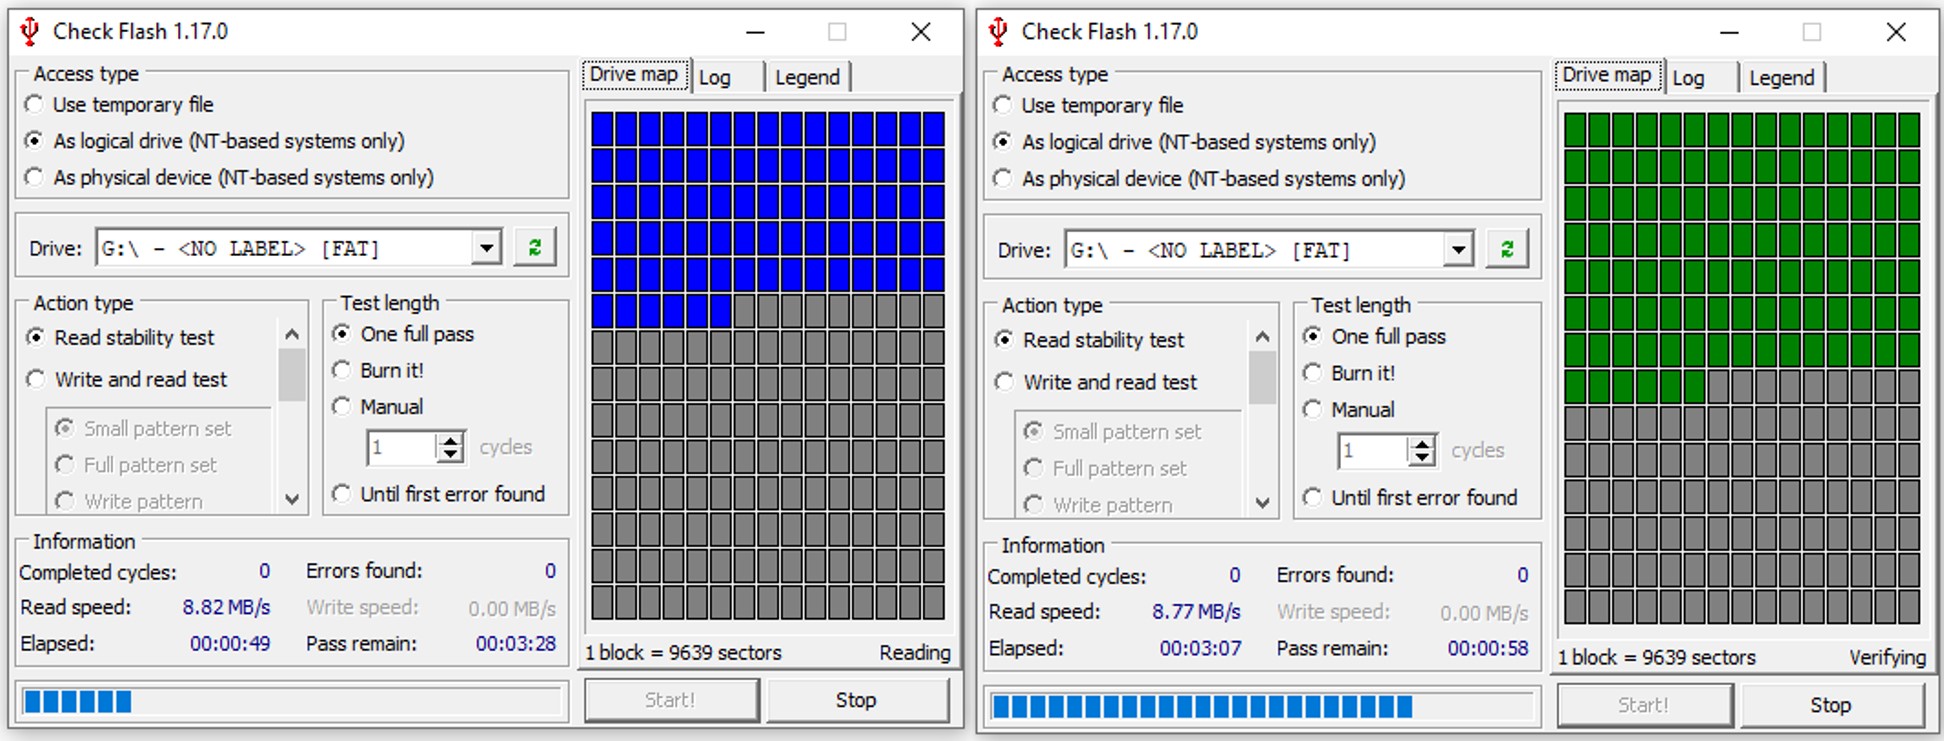
To begin the analysis, click on the “Start” button. The various blocks, which are composed of many sectors, on the flash storage medium are shown on the right of the window, under the “Drive map” tab, and examination occurs in sequence. The above image shows that the software has a “Legend” tab. Grey signifies an unanalyzed block, blue means the block has been read, green indicates a verified block, red is a physical drive error, and finally, yellow is a logical data error. This is a useful legend to keep in mind as the analysis proceeds.
Illustrated below is a screen shot of a Check Flash analysis in two stages. On the left is the read analysis and on the right the verification stage, which occurs after the completion of the read analysis.

The “Information” box at the bottom of the screen provides some data about the analysis such as time elapsed, time remaining, and more importantly read speed and errors found.
Final Analysis Results
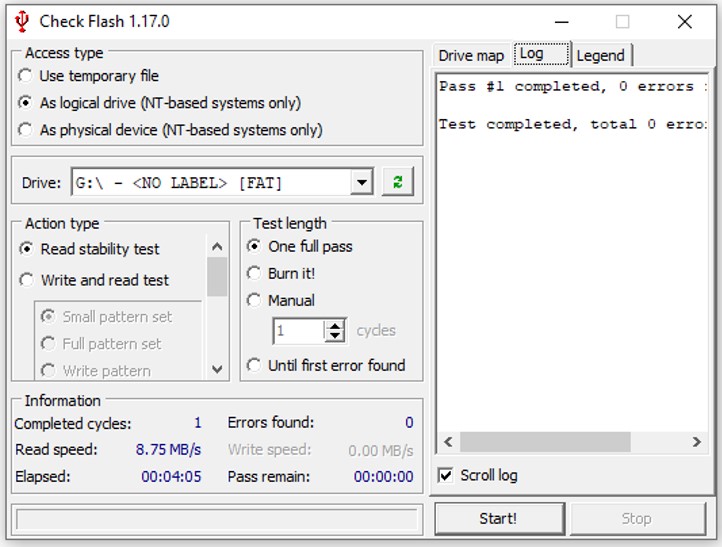
The screen below presents the results of the analysis. The read speed is 8.75 MB/s and no errors were detected. The analysis summary is under the “Log” tab on the right side of the Check Flash analysis software window.

In summary, this software is a useful tool for determining the condition of flash storage media, and is a must for those storing these materials.